
Using Box Plots in R
- Aug 24, 2017
- 5 min read
Box plots make interpretation of statistical information very simple. They are able to show mean, median, minimum, maximum, quartiles, and even outliers. If all this were put into a single table, interpretation would be tedious. Without explanation, inferring which elements represent which measures is probably going to be easy.

And as usual, colors can only help when multiple box plots are used on the same analysis. Of course, there are differences from histograms, thus, might not be used in all contexts. Still, any statistical context would benefit from dense information that is easy to use.
On the other hand, box plots aren’t easy to create in terms of calculations like quartiles, or details like outliers. Histograms are a little easier to create. But as soon as a computer does all the work to create a box plot, neither takes noticeably longer to create. So, it’s worth learning how to make box plots in R. SPSS can make box plots, but it uses R to do it anyway along with fewer options due to not using R libraries.
R is straightforward to install, just download and install from the website: http://www.r-project.org/

For even better control of plots of all kinds, install the ggplot2 library. To download, open R and type in: install.packages(“ggplot2”). Then type library(ggplot2) each time you use ggplot. This will make sure R is able to access all of ggplot’s features.

In order to read and access the data you want, use the read.table() function. To do this, type <data1 <- read.table(‘c:/file_path_name.csv’, header=T)>. Data1 is whatever you want to refer to your data as, the file name is self-explanatory, and header is if the first line is header. Then, type <attach(data1)> to subset data later on. See http://www.ats.ucla.edu/stat/r/modules/subsetting.htm for more details on this step.
Next is putting ggplot into action. Make sure the file you want to use has been opened in R already. Now, ggplot is ready to use. Many types of plots can be created, all of which are explained in ggplot’s documentation: http://docs.ggplot2.org/current/. <stat_boxplot> and <geom_boxplot> will be most useful for boxplots. There is another site for explaining ggplot, such as how to manipulate color or legends: http://www.cookbook-r.com/Graphs/
Put the data you want to use into a shorter name. I like to use data frames, which I usually call df, or what specifically I’m analyzing, but as long as it’s assigned with <- , it won’t matter. Even the read.table() function is fine to use. I’ll use df in the tutorial. For a basic boxplot, type <ggplot(df, aes(x=cond, y=rating)) + geom_boxplot()>. <aes> determines what will be on the x and y axes. I’m assuming a particular data set, so x and y will always be different. Here x is a categorical variable “cond” from df, while y is a numerical variable “rating” from df. <geom_boxplot> makes the boxplot.

Before going further, remake the box plot – right after y=rating, add a comma then type: fill=cond. This will color the box plots according to group. Start with the name of the plot and assign it to the code to make it easier to reference the plot. Like this: bp <- ggplot(…).

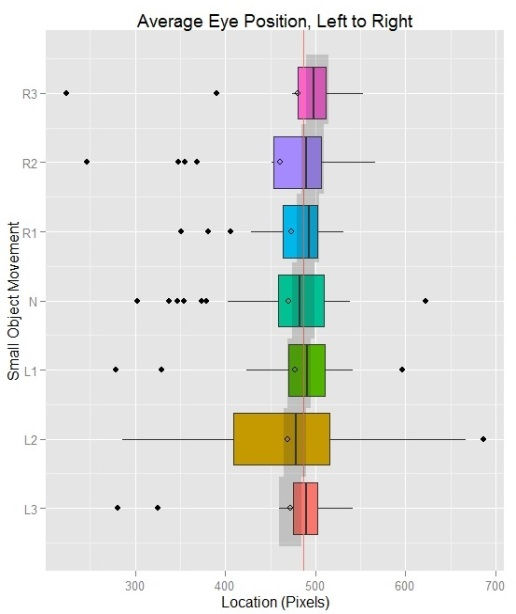
The good part about ggplot is that you can easily add onto your plot. Just type in the plot’s name, ‘+’, and continue typing as if still on the same line. Type <bp + guides(fill=FALSE)> to remove the legend. Sometimes it helps to assign after each modification. Type <bp + coord_flip()> to orient the box plot sideways. A sideways box plot is useful when data is actually mapped left-right, or when there is not a strict more-less dichotomy perhaps as in the frequencies of light (between gamma and ultraviolet). Repeat the ‘+’ for any other additions. For a little more information, add the mean to the plot <stat_summary(fun.y=mean, geom=”point”, shape=5, size=4)>. <fun.y> is a function with y and calculates the mean.
One more important part is naming or labeling the box plot. <ggtitle(“title”)> adds a title. <xlab(“x label”)> labels the x axis, and <ylab(“y label”)> labels the y axis. <theme(plot.title = element_text(face=”bold”))> modifies the typeface of the title, or whatever is in place of plot.title, like <axis.title.x>. Use <scale_fill_discrete(name=”someName”, breaks=c(“test1”,”test2”), labels=c(“Test One”,”Test Two”))> to add and modify the legend. Make sure guides are set to true after setting it to false earlier.
These are the essential parts of making a box plot in ggplot. Any more details that can be manipulated are listed in the documentation. <coord_cartesian> and <scale_x_discrete> and similar functions will help to make finer labels or manipulate the scale.
With a more intuitive understanding of box plots, I’ll explain their usefulness. Box plots were first invented by John Tukey as explained in his 1977 book, Explanatory Data Analysis. As I said earlier, a box plot condenses a lot of information. Given that statistics is largely about making connections between observations and ideas, they keep a user focused on a big picture. Some statistical tools for making calculations are great, but looking at a table of calculations would make a search for connections difficult. Bar charts and histograms work as a statistical tool for making visualizations, except box plots are worth attention for their density. In total, this style of visualization reflects Tukey’s philosophy of having ideas upon ideas (Brillinger, 2002).
However, Tukey himself saw existing flaws not of the information presented, but issues of visualization that led to misinterpretation of information (McGill, Tukey & Larsen, 1978). For instance, some people may be inclined to say that a set of medians would imply an overall median. This is sometimes appropriate when all the medians come from equally large groups of data. If one group is significantly bigger than the rest (say, when one sample size is 350 while the rest have a sample size of 15) the implication wouldn’t work out. One solution is to vary the width of the box depending on sample size – making the box proportional to the square root of the sample size is a useful method. Another issue is uncertainty in determining if a difference between two groups is significant. Even when one group is larger and shown with a variable width, the width isn’t actual size. Using notches, confidence intervals can be portrayed clearly. If the notch overlaps with another notch, then the difference is not significant. R uses the values of +/-1.58 IQR/sqrt(n) to determine how far to extend the notches. By fixing both issues, box plots become more useful.

There is one more consideration to make that applies to the type of statistics use. Some graphs will have long-tails. That is, most values will be on one side. For a box plot, one of the whiskers may extend far, indicating a long tail – a description of what the right side of a power law curve looks like. Values that are far from the median don’t make them less useful; the values on a long tail in total can have a significant impact of their own, as evidenced by online music sales or Amazon’s book sales (Anderson, 2004). Analysts would do well not to truncate tails for any reason. With a histogram, it’s not easy to tell what the bottom quartiles are if the data forms a long tail. Box plots are better for long tails because they at least approximate how far a long tail extends.

*
References
Chris Anderson. (2004, October). The Long Tail. Wired. Retrieved from http://www.wired.com/wired/archive/12.10/tail.html?pg=2&topic=tail&topic_set=
David R. Brillinger. (2002). John W. Tukey: His Life and Professional Contributions. The Annals of Statistics, 30(6). doi:10.1214/aos/1043351246
McGill, R., Tukey, J.W., Larsen, W. A. (1978). "Variations of Box Plots". The American Statistician, 32 (1): 12–16. doi:10.2307/2683468


Comments